Greetings Friends! 🥂
Today is the continuation of “Kefir Magic”, where the magical elixir was broken down into the health benefits, defining what Kefir is (and what it is not) and a simplified overview of Commercially produced Kefir vs Homemade Kefir.
For those wanting a review, see here ⬇️
The natural (pun intended) followup on the Kefir Primer would be a How-To Guide for making at home.
Coffee ☕️ Deadline:
If you missed the February release announcement, Octopod Coffee ☕️ is slated for roasting next week.
The First Blend (Tasting notes: Milk Chocolate, Caramel, Macadamia, Marshmallow), and an insanely delicious Natural Process (Tasting Notes: Blackberry, Brown Sugar, Graham Cracker) from Guatemala.
If you haven’t tried yet, place your order now to get in on the best coffee’s being offered anywhere.
The quality, flavor profiles and shipping from Roast date make these coffee’s sublime!
Process
At it’s most basic, milk is poured over kefir grains and left to ferment for 18-24 hours. The resulting liquid is then strained to separate the kefir grains, at which time the liquid kefir can be consumed or stored in the fridge. The process is then repeated immediately so you have a fresh batch of Kefir ready for the next day.
Yes it’s that simple, but with a lot of variables
Equipment
For a simple setup to make at home:
(2) Glass Mason Jars (quart size)
(1) Strainer (non metallic; *stainless steel is ok), or cheesecloth
(1) Rubber band
*Coffee filter or cloth (to cover jar opening, while fermenting)
Myths
Here is where things get really interesting. Kefir has a huge cult-like following and if you do any lengthy research you will see massive debates over milk-types, starters, and more.
A few myths you’ll see:
-Never use UHT milk
-Only use Raw Milk
-Don’t use Raw Milk
And a host of other contradictory opinions, so let’s break down the milk, starter and little pasteurization science (TLDR style) to demystify and get you confident to make your own Kefir.
What Milk to Use
There are many options here; Whole Milk, 2% or Fat-Free. Add to that 3 forms of milk appearing in Raw, Pasteurized, or UHT (Ultra High Temp Pastuerized). Also grass-fed, organic or “storebought”.
You’ve got well over a dozen options 😂
So first and foremost, it is ENTIRELY your preference on what milk you want to use, here are a few variables to help you understand how the type of milk “can” effect your Kefir making. (*Remember we are dealing with microbiology, bacteria, yeasts, etc. All of which can be variable, even based on your residence and environment)
Pasteurization is used to extend the shelf-life of milk by heating for a specified period of time, to kill/neutralize unwanted bacteria. In the course of efficiency it was discovered that milk, when heated to higher temperatures, could be pasteurized more quickly and also had the benefit of extending shelf-life further.
This is where you get the distinction of Pasteurized vs UHT.
Some Kefir advocates say to never use UHT because of the heat applied to the milk, but does that make sense?
Consider: For Kefir to ferment, the lactose sugars are what the microbes feed on to make this reaction occur. Kefir grains don’t need fat to feed on (certain microbes will interact with some fats, but it is not essential). So as long as you have lactose sugar, in milk, there is available food for the Kefir Grains.
UHT does structurally change the proteins and radically changes the fats breaking down the milk fat globule membrane, proteins and particle size; while this could effect growth of some bacterial strains, it would only slow (and not halt) growth. (See: Focus on the supramolecular structure of milk fat in dairy products)
So in the end, while UHT milk should not hamper Kefir Making, it may result in a slightly thinner texture. (More on texture, below)
It’s worth noting that most Organic Milks have undergone UHT pasteurization.
Raw Milk has not undergone any pasteurization and therefore has the full array of microbes that naturally occur (including any that are introduced during the milking process at the farm/facility). This is why there is much more room for contamination and vetting your Raw Milk source for cleanliness through a referral or inspection is good wisdom. This is also why you see some people advise against using raw milk to make Kefir. It is possible that the microbe load in the Raw Milk would out-compete the Kefir Grains, starving off and rendering the Kefir Grains useless. (*I’ve seen many people use Raw Milk to make Kefir; Kefir Grains are resilient, but a reputable Raw Milk source should be used).
Starter Options
Freeze-Dried: These are starter packets that are made in a laboratory setting with specific lacto-bacteria and yeast strains, with an inclusion of sugar. This is used in milk to start your kefir making, and then part is reserved to “seed” subsequent batches.
Dehydrated: Kefir Grains that are matured, then dehydrated. The producer will include instructions on how to rehydrate the grains; can be hit or miss at times.
Fresh: This is the option 🐙 recommends. Finding a producer that has fresh, live, Kefir Grains (not selected for in a Lab) that you can add straight to milk and start harvesting. Depending on your geography, delivery may be an issue. The Fresh Grains should be used quickly upon receipt to keep them active.
For sourcing, I highly recommend my friends at GEM Cultures. These peeps are pros with starters that run the gamut from Koji, Sourdough, Kombucha to Kefir. Not an affiliate, just a very happy customer over the years. *Note you want Milk Kefir Grains, not Water Kefir Grains. That’s a separate culture.
Environmental Factors
Temperature: Kefir does best when fermented between 65-75F. If you are fermenting in a higher temperature, remember that fermentation will most likely accelerate, and expect a more tangy, tart, sour flavor.
Flavor: For a less flavorful Kefir, you can put in the fridge for 4-6 days and you’ll have a much softer, less flavorful version. Also, you won’t have it available daily.
Texture: Texture will be influenced by the type of milk (whole milk will yield a thicker Kefir than Fat-Free) and also the amount of Grains used per batch. As you continue to reuse the grains they will grow, which will also contribute to a thicker viscosity of Kefir.
Carbonation: If you want a bit of fizz in your Kefir, you can put a lid on the jar for the last few hours which will facilitate some CO2 retention. This is purely a matter of preference.
Making Your Own:
(Fresh Grains Protocol)
1) Take a clean mason jar, 2 cups of milk (your choice, see above), and your Fresh Grains.
2) Pour the milk over the grains, and lightly swirl the jar to incorporate.
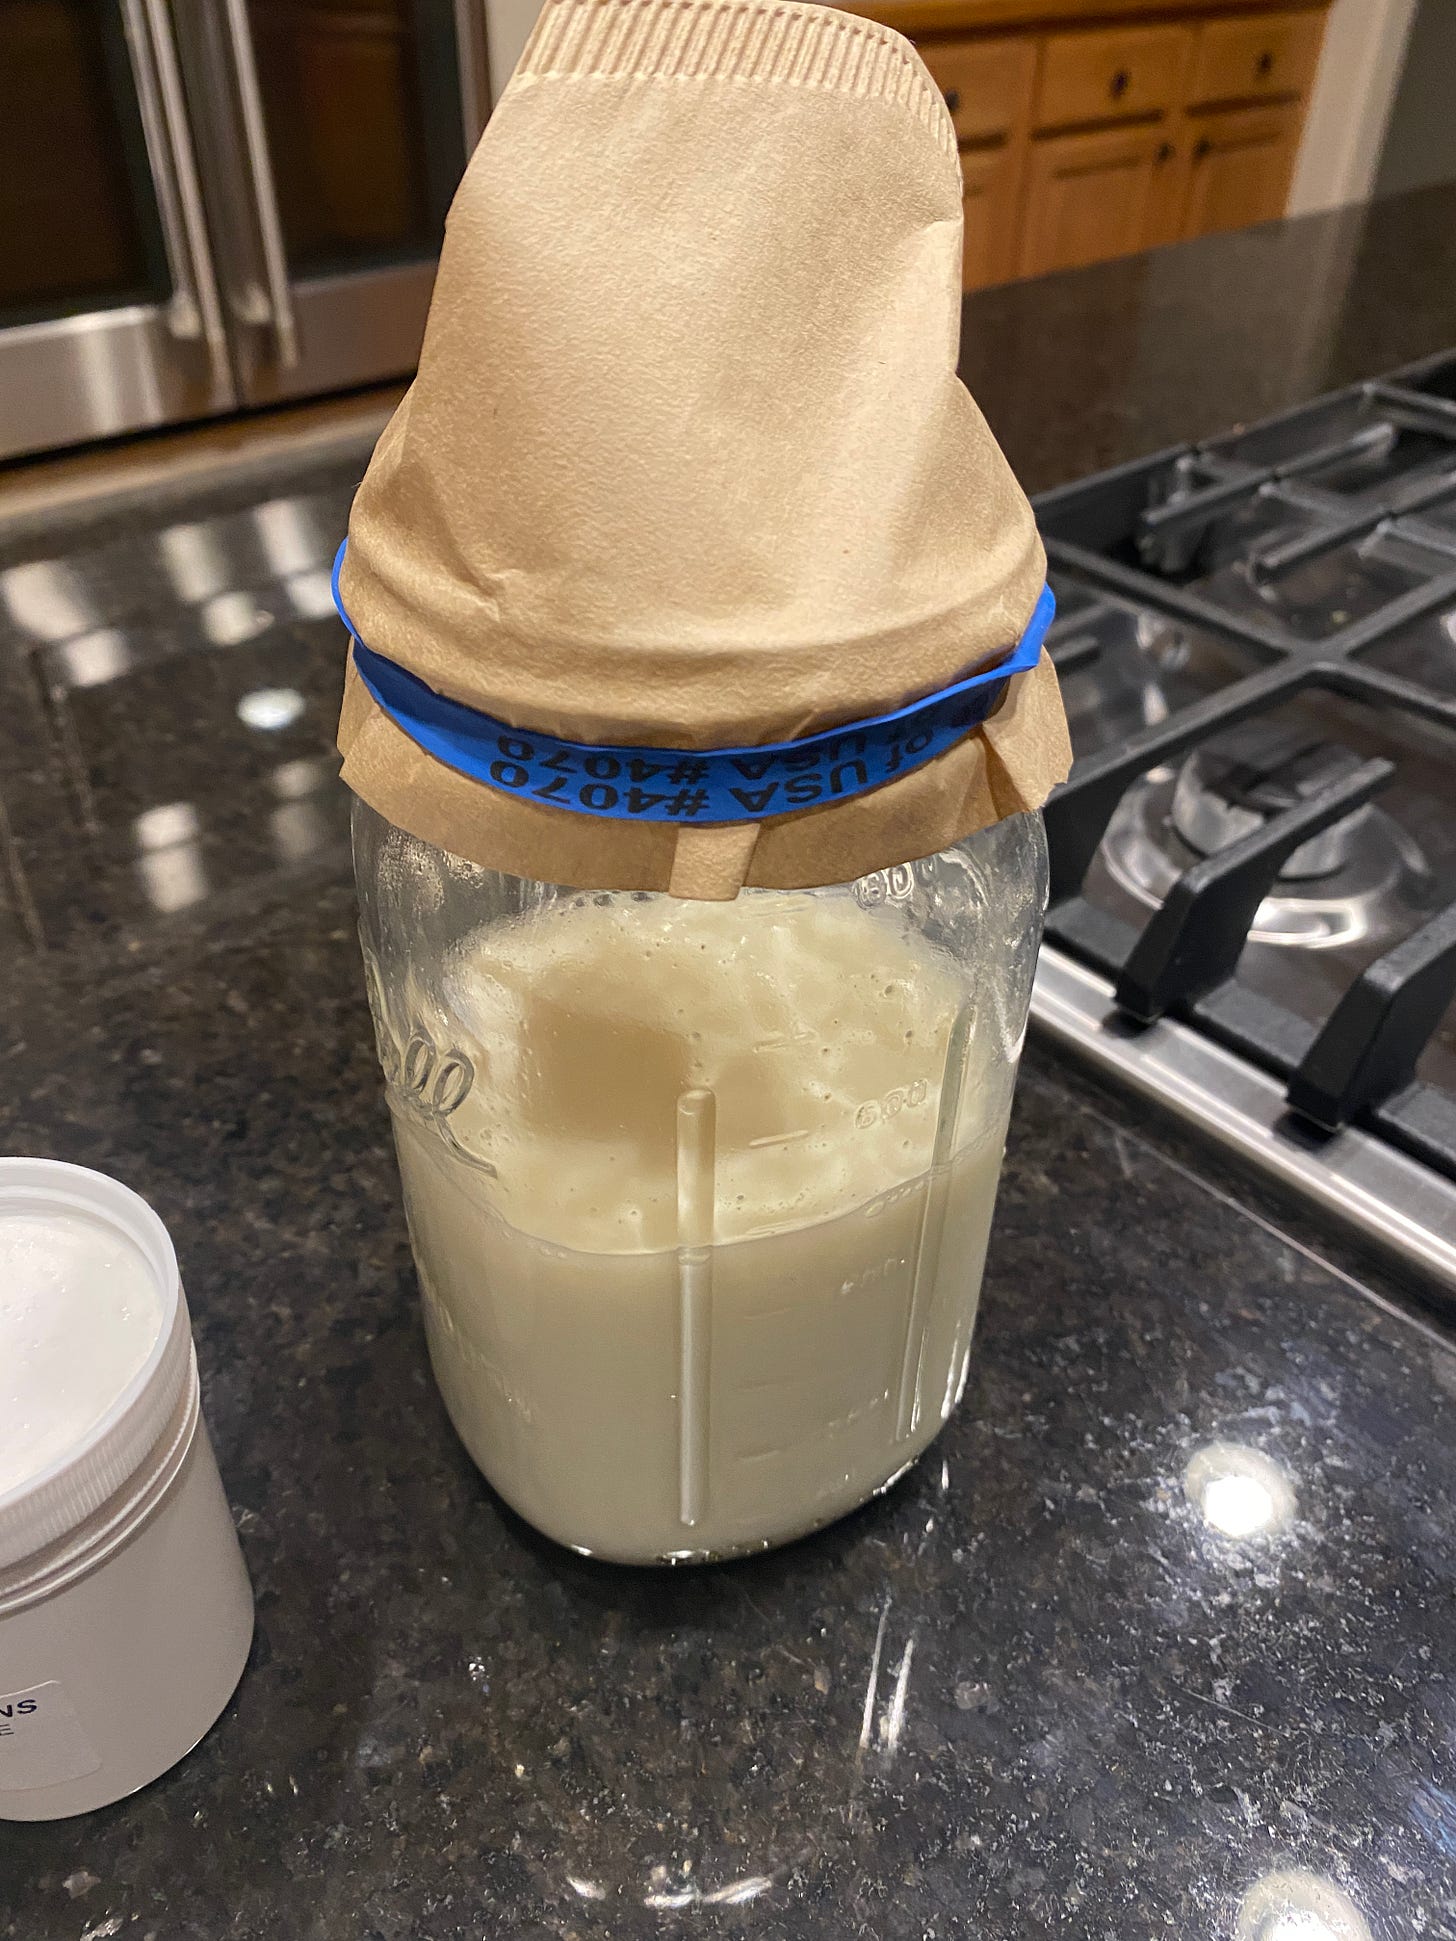
3) Cover with a coffee filter (or cheese cloth), secure with a rubber band. And ferment at 65-75F for 18-24 hours. (If possible, swirl a few times throughout the process; the liquid may separate during fermentation)
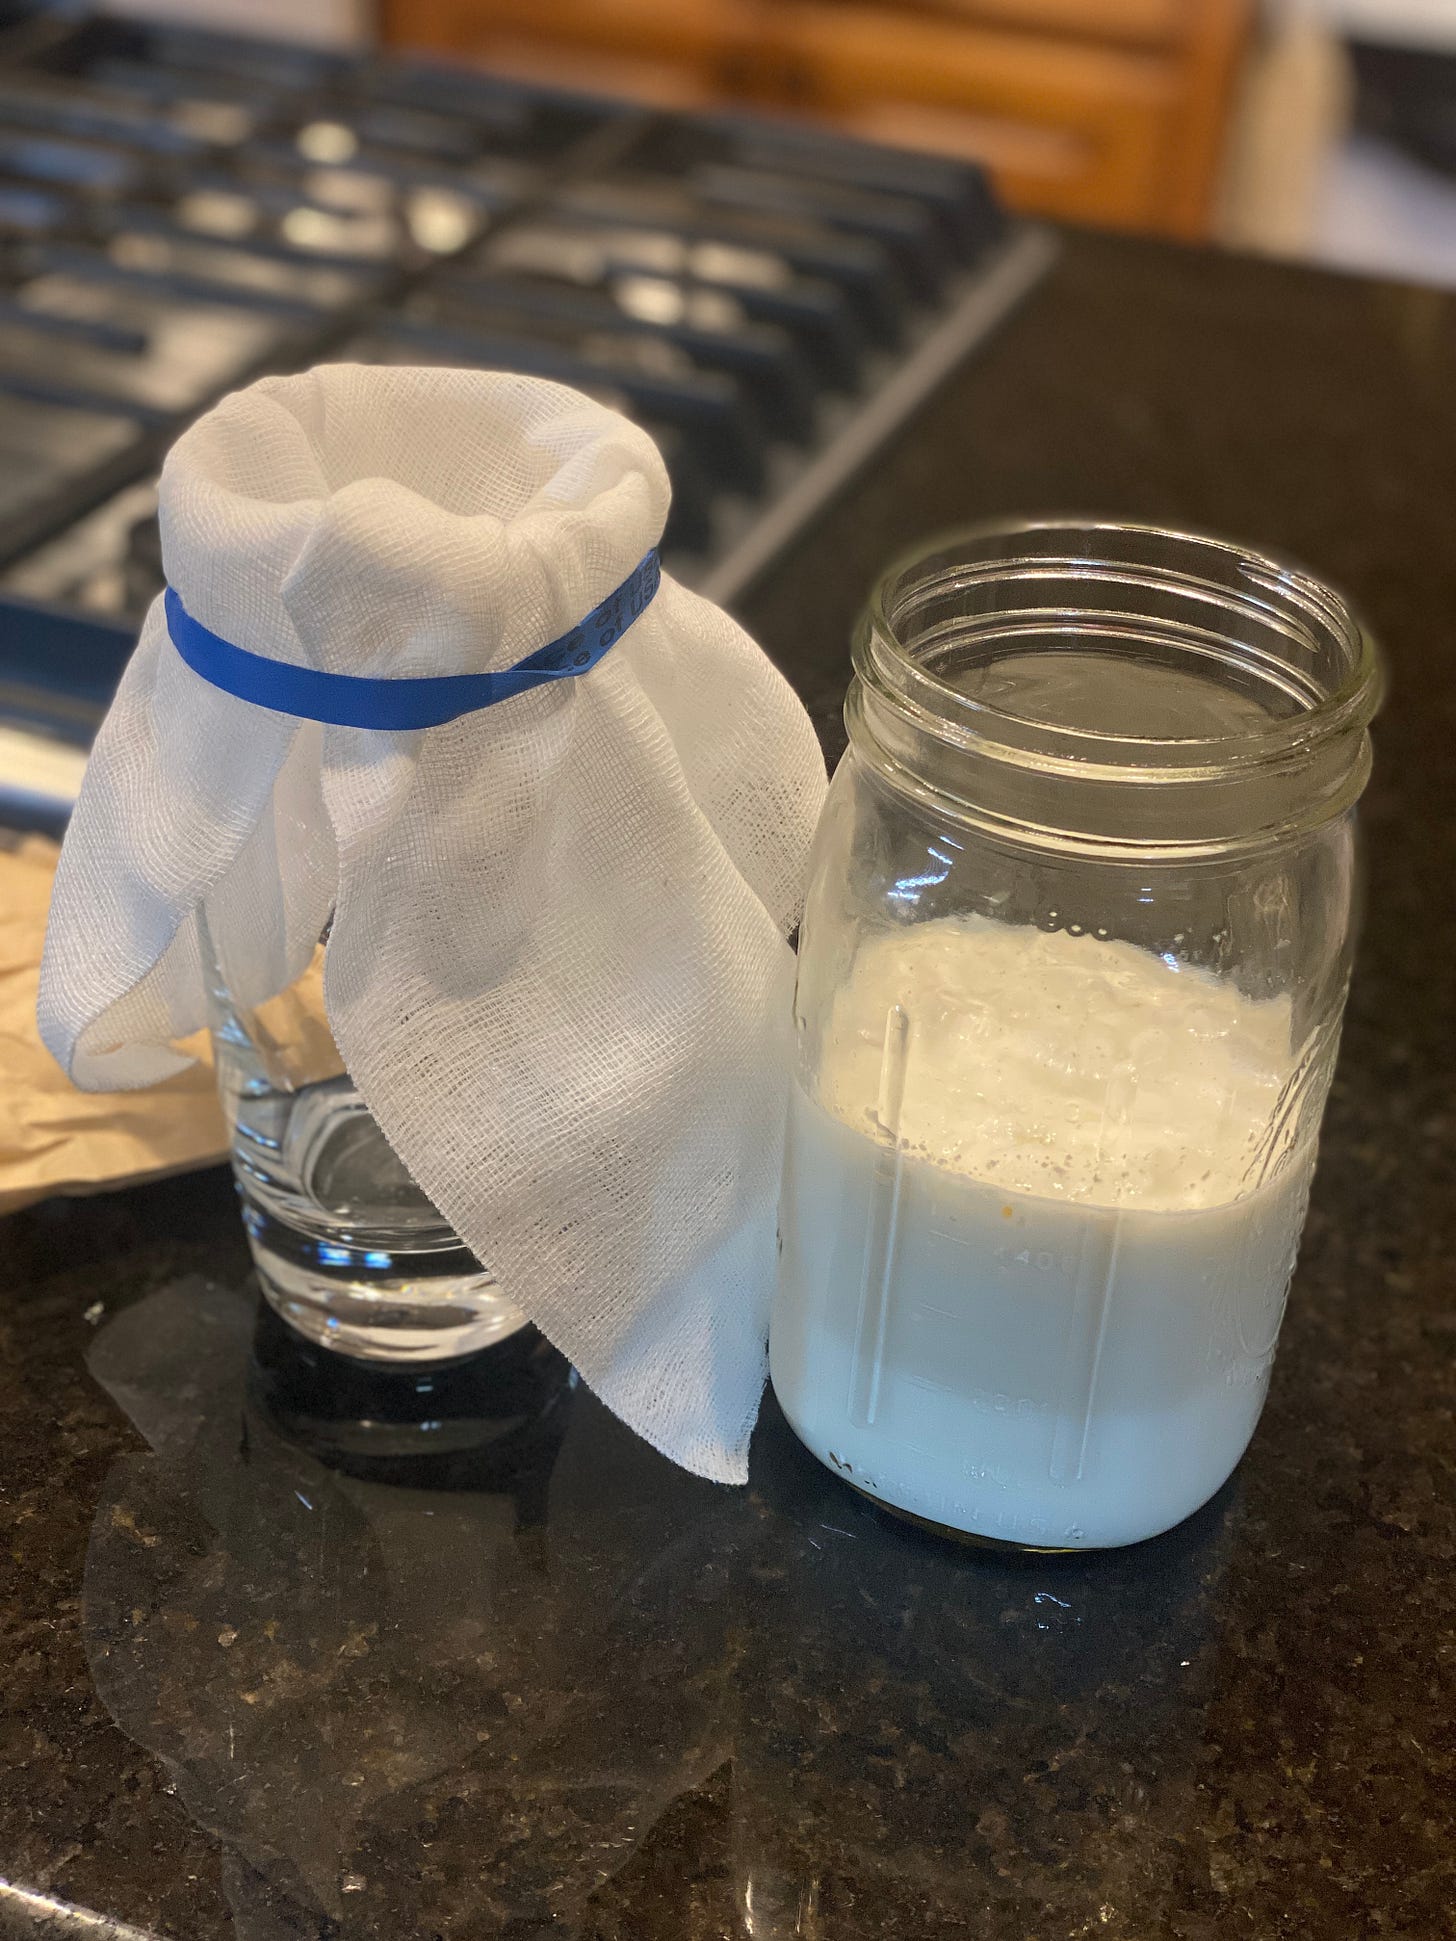
4) When ready, (you’ll start seeing bubbles after 12 hours or so; usually), setup a strainer or cheesecloth and strain the kefir. (Milk Kefir Grains are reactive, so aluminum, copper, iron, etc are no bueno for straining).
5) Then simply take the strained Kefir Grains and put into a clean Mason jar and start the process over again. Fresh Kefir, on the Daily… Fermentation Magic 🪄
Don’t Forget, Valentines Day is coming up!
Nothing says “I LOVE YOU” like setting up your significant other with a:
-Multi-Purpose Cutting board
-Razor Sharp 🐙 Chef knife
-Annual Substack Subcription (can gift to any recipient)
See all the details here for an $80 savings!
Until Next Time! 🥂


I've experimented a ton with kefir and started your way.
I've always used raw goat's milk and never had an issue. Once you get enough grains, you can make lazy man's kefir where you don't even have to strain it. You can scoop a few spoonfuls of grains off the top of the jar and add to the next batch. However, with a bunch of grains, the whey will separate quicker, and I usually strain the whey out and second ferment the remaining curds. This reduces the sourness considerably and decreases lactic acid load. At this point, you can add fruit, honey, or other components to the kefir to enhance its flavor.
I've fermented kefir up to three days before, but 18 hours or so seems to be the sweat point (based on your ambient temperature). Once you've filtered out your grains, you can pretty much drink it over the course of a day or two at room temperature with little risk beyond additional sourness.
I've had my grains for a long time and have even inoculated them with rare bacteria strains for gut health, so I usually keep a spare batch of grains in the freezer in case something happens to my active batch. I've revived frozen kefir grains after a month of inactivity before without any issues.
I'm going to order fresh grains from gem cultures. Will one order be enough? And how long will it last?